Extract-N-Amp™ FFPE Tissue PCR Protocol
REDExtract-N-Amp™ Tissue PCR Kit Protocol, for formalin-fixed paraffin embedded sections
The following procedure is a modification of the Extract-N-Amp™ Tissue PCR protocol. Other DNA starting samples (PDF) may also be used. Download the full REDExtract-N-Amp™ Tissue PCR Kit Protocol (PDF) of the original protocol for a complete list.
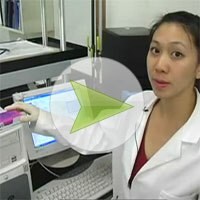
Click the image to see a researcher use the Extract-N-Amp™ kit for mouse tails and scroll below to see a modification of the same protocol for FFPE samples.
Product Number XNAT, available in 10RXN, 100RXN and 1000RXN pack sizes.
Note:
The quality of DNA present in formalin-fixed, paraffin-embedded tissues can be variable depending on a number of factors among which include the age of the sample, the treatment of the sample before fixation, the fixation time and fixation conditions. Fixed samples in some cases may not contain DNA of sufficient quality for many downstream applications including amplification with the Extract N Amp™ Tissue PCR kit.
DNA extraction from FFPE Animal tissues:
All steps are carried out at room temperature unless otherwise noted.
- Pipette 100 µL of Extraction Solution into a microcentrifuge tube or well of a multiwell plate.
Add 25 µL of Tissue Preparation Solution to the tube or well and pipette up and down to mix.
Note: If several extractions will be performed, sufficient volumes of Extraction and Tissue Preparation Solutions may be pre-mixed in a ratio of 4:1 up to 2 hours before use. - Carefully slice a small section of paraffin embedded tissue out of your sample, then scrape/slice excess paraffin from sample. Weigh approximately 5 mg of the tissue sample, and place in a 1.5 mL microcentrifuge tube (not provided).
- Incubate sample at room temperature for 10 minutes.
- Incubate sample at 95 °C for 3 minutes. Note: Tissues will not be completely digested at the end of the incubations. This is normal and will not affect performance.
- Add 100 µL of Neutralization Solution B to sample and mix by vortexing.
- Store the neutralized tissue extract at 4 °C or use immediately in PCR. Continue with Section C, step 1. Note: For long term storage, remove the undigested tissue or transfer the extracts to new tubes or wells. Extracts may now be stored at 4 °C for at least 6 months without notable loss in most cases.
PCR amplification
The REDExtract-N-Amp™ PCR Reaction Mix contains JumpStart Taq antibody for specific hot start amplification. Therefore, PCR reactions can be assembled at room temperature without premature Taq DNA polymerase activity. Typical final primer concentrations are approximately 0.4 µM each. The optimal primer concentration and cycling parameters will depend on the system being used.
1. Add the following reagents to a thin-walled PCR microcentrifuge tube or plate:
*Note: The REDExtract-N-Amp™ PCR Reaction Mix is formulated to compensate for components in the Extraction, Tissue Preparation, and Neutralization Solutions. If less than 4 µL of tissue extract is added to the PCR reaction volume, use a 50:50 mixture of Extraction:Neutralization B Solutions to bring the volume of tissue extract up to 4 µL.
2. Mix gently.
3. For thermal cyclers without a heated lid, add 20 µL of mineral oil on top of the mixture in each tube to
prevent evaporation.
4. Perform thermal cycling. The amplification parameters should be optimized for individual primers, template,
and thermal cycler.
Common cycling parameters:
- The amplified DNA can be loaded directly onto an agarose gel after the PCR is completed. It is not necessary to
add a separate loading buffer/tracking dye.
Note: PCR products can be purified, if desired, for downstream applications such as sequencing with the GenElute™
PCR Clean-Up Kit.
To continue reading please sign in or create an account.
Don't Have An Account?